Essential Linux Commands Every Cybersecurity Student Should Know
Student Vocation Cybersecurity Learning Series — Lesson 12 of 30
Welcome to Lesson 12 of the Student Vocation Cybersecurity Learning Series!
In Lesson 11, we introduced Linux, explained the terminal and shell, explored the Linux file system, and practised a few basic commands.
Now it is time to expand your skills.
Linux commands help you interact with a computer through a text-based interface. Instead of relying entirely on graphical menus, you can use commands to navigate directories, inspect files, search text, check system information, and understand what your computer is doing.
These abilities are valuable in cybersecurity because professionals frequently work with server logs, configuration files, running processes, and system information.
You do not need to memorise every command today. Focus on understanding what each command does, when it is useful, and how to use it safely.
-
Understanding Linux Command Syntax
A command is an instruction entered into a shell.
A command line may contain three main elements:
- Command: The program you want to run.
- Option: A setting that changes how the command behaves.
- Argument: A value, such as a filename or directory, on which the command operates.
For example:
ls -l lesson-note.txt
Here:
- ls is the command.
- -l is an option that requests a long-format listing.
- lesson-note.txt is the argument identifying the file.
Spaces separate the command’s elements. Filenames containing spaces may need quotation marks or other appropriate shell quoting.
For example:
cat “my lesson notes.txt”
Linux commands are generally case-sensitive. For instance, Notes.txt and notes.txt may refer to different files.
Important: Always read a command before pressing Enter. A command that only displays information is different from one that changes, moves, or removes files.
-
Commands for Navigating Directories
Before inspecting files or investigating a system, you need to know where you are.
- pwd — Display the Current Directory
Run:
pwd
This prints the path of your current working directory.
Example output:
/home/student
The actual output depends on your account and environment.
Cybersecurity use: Knowing your current location helps prevent mistakes when examining files or running commands.
- ls — List Directory Contents
Run:
ls
This displays entries in the current directory.
Useful variations include:
Command |
Purpose |
| ls | Lists visible directory entries |
| ls -l | Shows a detailed listing |
| ls -a | Includes hidden entries |
| ls -la | Combines a detailed listing with hidden entries |
| ls /home | Lists entries in the specified directory, subject to access permissions |
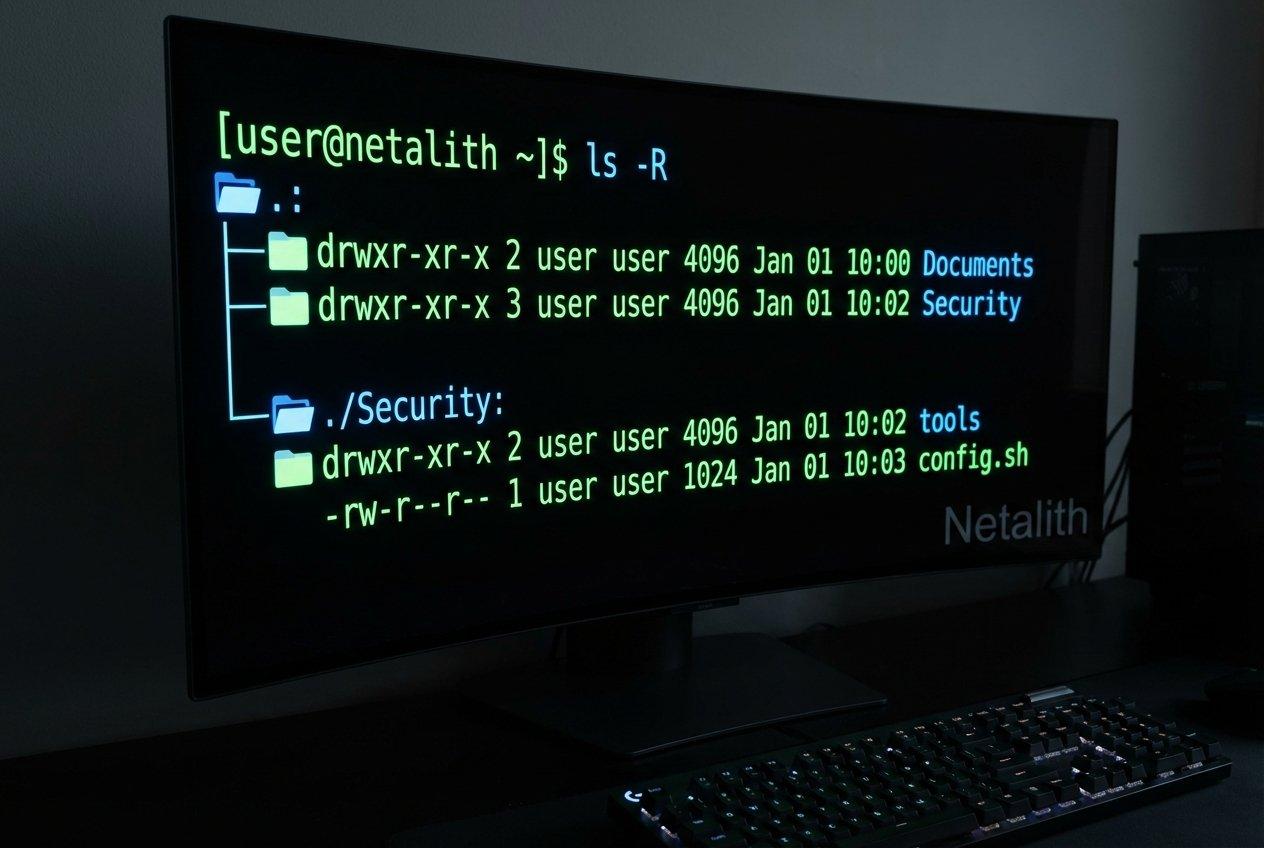
A long-format listing may show file permissions, ownership, size, modification time, and filename.
Hidden filenames on Linux commonly begin with a dot, such as .profile.
- cd — Change Directory
The cd command changes your shell’s working directory.
Examples:
cd ~
Moves to your home directory in common shells.
cd ..
Moves to the parent directory.
cd /tmp
Attempts to move to /tmp, if it exists and is accessible.
cd –
In many common shells, returns to the previous working directory.
Practical tip: Use pwd after changing directories when you are unsure where you have landed.
-
Commands for Creating and Organising Files
Cybersecurity students often need to create practice folders, organise notes, and prepare sample files.
- mkdir — Create a Directory
Example:
mkdir linux-lab
Creates a directory called linux-lab in the current directory, provided it does not already exist and you have permission to create it.
To create a directory inside your home directory:
mkdir -p ~/linux-lab/notes
The -p option creates missing parent directories as needed and does not report an error merely because the target directory already exists.
- touch — Create an Empty File or Update Timestamps
Example:
touch practice.txt
If the file does not exist, this ordinarily creates an empty file. If it already exists, touch normally updates its timestamps rather than clearing its contents.
- cp — Copy Files
Example:
cp practice.txt practice-copy.txt
This creates a copy of practice.txt named practice-copy.txt in the current directory.
Use this only when the source file exists and you have permission to read it and create the destination.
- mv — Move or Rename Files
Example:
mv practice-copy.txt practice-backup.txt
This renames the file in the same directory, provided the destination and permissions allow it.
When moving files, pay attention to the destination. Depending on the situation, mv can replace an existing destination file.
- rm — Remove Files
The rm command removes directory entries and, depending on the options and target, can delete files or directories.
Because removal can be difficult or impossible to reverse, do not experiment with rm on unfamiliar paths. For this lesson, you do not need to run it.
Before any file-changing command, verify your location with pwd and inspect the intended target.
-
Commands for Reading Text Files
Cybersecurity professionals often need to inspect configuration files, notes, and logs. Linux provides several commands for viewing text.
- cat — Display File Contents
Example:
cat practice.txt
Displays the contents of the file in the terminal.
For a short file, this is convenient. For a very large file, it may produce more output than you can easily read.
- less — Read Longer Files
Example:
less practice.txt
Opens a text file in a viewer that allows you to move through its contents.
In many implementations, press q to exit the viewer.
- head — Display the Beginning of a File
Example:
head -n 5 practice.txt
Displays the first five lines of the file.
This is useful when you want to inspect the beginning of a long text file.
- tail — Display the End of a File
Example:
tail -n 5 practice.txt
Displays the last five lines.
System administrators and security analysts may use tail when reviewing the most recent entries in a log. Remember to access only logs you are authorised to inspect.
- wc — Count Lines, Words, and Bytes
Example:
wc -l practice.txt
Counts the number of lines in the file.
Other useful forms include:
- wc -w practice.txt — Counts words.
- wc -c practice.txt — Counts bytes.
These commands help you understand the size and structure of text data.
-
Commands for Searching Text
Finding relevant information in a large text file is a common administrative and security task.
- grep — Search for Matching Text
Suppose a practice file contains:
System started successfully
User signed in
Backup completed
User signed out
To search for lines containing the word User, run:
grep ‘User’ practice.txt
The command prints lines matching the search pattern.
To search without distinguishing uppercase and lowercase letters:
grep -i ‘user’ practice.txt
To display line numbers for matches:
grep -n ‘User’ practice.txt
The exact matching behaviour depends on the pattern and options used.
- find — Locate Files and Directories
The find command searches a directory tree according to criteria you specify.
For example, from inside your dedicated practice directory:
find . -type f
This lists regular files beneath the current directory, represented by ..
To look for files with a .txt extension in the current practice directory and its subdirectories:
find . -type f -name ‘*.txt’
The quotation marks help ensure the shell passes the wildcard pattern to find rather than expanding it against filenames in the current directory.
Cybersecurity use: These commands can help locate authorised log files, configuration files, and other relevant data during an investigation.
Always select a search location you are permitted to inspect.
-
Commands for Sorting and Processing Text
Linux includes small utilities that can be combined to process text.
- sort — Sort Lines
Example:
sort practice.txt
Prints the file’s lines in sorted order without modifying the original file by default.
- uniq — Identify Adjacent Duplicate Lines
Example:
sort practice.txt | uniq
This sorts the lines and then removes adjacent duplicate lines from the output.
The vertical bar, |, is called a pipe. It sends the output of one command to another command as input.
Sorting first makes identical lines adjacent, allowing uniq to group them.
- cut — Select Fields from Text
For a simple comma-separated practice file, such as:
alice,student
ben,analyst
chika,student
You can display the first comma-separated field using:
cut -d ‘,’ -f 1 practice-users.csv
Here, -d ‘,’ identifies the comma delimiter and -f 1 selects the first field.
This example is for a simple practice file. Real CSV data can contain quoted commas and other complexities that cut does not fully interpret.
-
Commands for Checking System Information
Cybersecurity students need to understand the environment they are working in.
- whoami — Display the Effective Username
Run:
whoami
This shows the effective username associated with the current command session.
- uname — Display Kernel Information
Run:
uname -s
On Linux, this normally prints:
Linux
To display more system and kernel information:
uname -a
The result depends on the system and can include the kernel name, hostname, release, version, machine architecture, and other fields.
- hostname — Display the System’s Hostname
Run:
hostname
This displays the system’s configured hostname.
A hostname is a name assigned to a computer or system. It is not necessarily the computer’s public internet address.
- date — Display the Date and Time
Run:
date
This displays the system’s current date and time according to its configuration.
Correct time settings matter for interpreting timestamps in logs and comparing events during an investigation.
- df -h — Check File-System Space
Run:
df -h
This reports file-system space usage in a human-readable format.
It can help you identify file systems that are running low on available space.
- free -h — View Memory Information
Run:
free -h
On Linux systems that provide this utility, it displays memory and swap usage in a human-readable format.
This can help you understand the system’s memory situation, although the output alone does not diagnose a security incident.
-
Commands for Viewing Running Processes
A process is a running instance of a program.
Understanding processes helps administrators and analysts inspect system activity.
- ps — Display Process Information
Run:
ps
This displays information about processes associated with the current terminal session, depending on the system.
A broader snapshot can be requested with:
ps aux
On common Linux systems, this shows a wider list of processes with details such as users, resource usage, and command names.
The output is a snapshot. It does not continuously update.
- top — View Processes and Resource Usage
Run:
top
This opens an interactive display that typically updates process and resource information while running.
Press q to quit on standard implementations.
Use these tools to learn what is running on your own authorised environment. A process name alone is not enough to establish that a program is malicious; investigate evidence carefully before drawing conclusions.
-
Commands for Understanding Network Configuration
Linux systems provide commands that help you inspect local network settings.
- ip addr
Run:
ip addr
On systems with the standard ip utility, this displays network interfaces and their assigned addresses.
- ip route
Run:
ip route
This displays IPv4 routing information on systems using the standard ip utility.
These commands inspect local configuration. They do not, by themselves, test the security of another computer or network.
In later lessons, we will build on these concepts when exploring network analysis and security tools. Practise only within systems and networks you own or are explicitly authorised to examine.
-
Getting Help with Linux Commands
You do not need to remember every command or option.
- –help
Many commands provide a help option.
Example:
ls –help
This displays usage information for implementations that support that option.
Not every program uses exactly the same help format.
- man — Manual Pages
Example:
man ls
Opens the manual page for ls when the relevant manual is installed.
Press q to exit a standard manual-page viewer.
- Check Before Running an Unfamiliar Command
Before executing an unfamiliar command:
- Read its description.
- Identify what files, accounts, or systems it may affect.
- Review its options and arguments.
- Avoid adding administrative privileges unless necessary and understood.
- Test it in a dedicated learning environment whenever possible.
Never paste an unknown command into a terminal just because a website or social media post tells you to do so.
-
Understanding the Pipe and Redirection
Two command-line features make Linux especially useful for text processing: pipes and redirection.
The pipe symbol: |
A pipe sends one command’s standard output to another command’s standard input.
Example:
sort practice.txt | uniq
Here, sort produces sorted text and uniq processes that output.
Output redirection: >
The > operator directs output into a file, replacing the file’s existing contents if the file already exists.
Example:
printf ‘Linux practice note\n’ > practice-output.txt
This creates the file if needed or replaces its contents.
Append redirection: >>
The >> operator appends output to a file instead of replacing its existing contents.
Example:
printf ‘Second practice line\n’ >> practice-output.txt
Be careful with both operators: the destination path matters, and redirection can overwrite information.
-
Safe Practical Linux Lab: Work with Sample Files
Activity title: Linux Command-Line Essentials
Objective: Practise navigation, file creation, text viewing, searching, sorting, and system inspection.
Required environment: Your own Linux computer, an authorised WSL environment, or a learning virtual machine you are permitted to use.
Safety requirements:
- Work only in your dedicated practice directory.
- Do not use sudo or root privileges for this lab.
- Do not inspect files belonging to other users without permission.
- Do not run commands against external systems.
- Read each command before running it.
- Avoid using rm, recursive deletion options, or commands copied from unknown sources.
Part A: Enter your practice directory
Run these commands one at a time:
cd ~
mkdir -p linux-practice
cd linux-practice
pwd
Check that the displayed location is your home directory followed by linux-practice.
Part B: Create a sample activity log
Run:
printf ‘System started successfully\nUser signed in\nBackup completed\nUser signed out\n’ > activity.log
This creates a small sample log file in your practice directory. If a file with this name already exists, its contents will be replaced, so use this command only if you do not need to preserve an existing file.
Display the file:
cat activity.log
Expected output:
System started successfully
User signed in
Backup completed
User signed out
Part C: Search the sample log
Run:
grep -n ‘User’ activity.log
This displays the matching lines and their line numbers.
You should see the two lines containing User, with their corresponding line numbers.
Now count the lines:
wc -l activity.log
Expected result: 4 activity.log, although spacing may differ.
Part D: Create a second sample file
Run:
printf ‘orange\napple\nbanana\napple\n’ > fruits.txt
Sort the entries:
sort fruits.txt
Then display the sorted unique entries:
sort fruits.txt | uniq
The unique output should contain apple, banana, and orange, in sorted order.
The original file remains unchanged by these commands.
Part E: Inspect your files and environment
Run each command separately:
ls -l
whoami
uname -s
date
df -h
Observe what each command tells you.
If your Linux environment supports the following utilities, you may also try:
free -h
ps
These commands inspect information about your local environment. Their output may differ between systems.
Part F: Record your findings
Write down your answers:
- Which command displayed your current directory?
- Which command searched for the word User in your sample log?
- Which command counted the lines in log?
- What did the pipe do in sort fruits.txt | uniq?
- Which command displayed file-system space usage?
Expected learning outcomes
By completing this lab, you should be able to:
- Navigate to a practice directory.
- Create and display sample text files.
- Search for matching text.
- Count lines in a file.
- Sort text and remove adjacent duplicate lines.
- Inspect basic system information.
- Explain why command syntax and safe working directories matter.
PREVIOUS LESSON | NEXT LESSON